Sanding Discs for 1/2" Motor Shaft
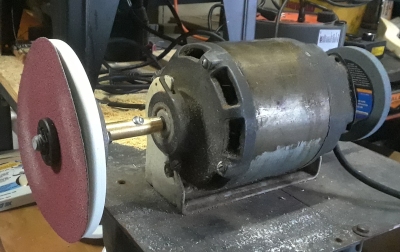
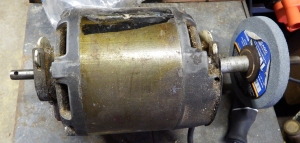
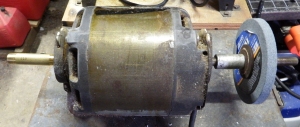
In my makeshift shop I had a motor mounted on a table with a stone wheel on one end and a bare 1/2" shaft on the other. I decided to see if I could make and attach some sanding discs to the bare shaft, making use of the other side of the motor.
I looked at a lot of different motor shaft adapters that would fit a 1/2" non-threaded shaft but found no easy solution. During my search I found out that there are quite a few people out there looking for some type of adapters for 1/2" shafts. I comcluded that I would need to be creative.
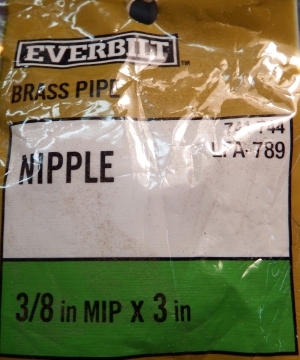
I started out with a 3/8" cast nipple, and proceeded to drill out the center to make it a true 1/2" ID. When I had a working piece, I began to design my wheels. When putting the prototypes together, I realized that I was not able to drill the cast pipe concentrically, and was left with a slight wobble when mounted. I needed to find a better solution.
At Home Depot I found the same 3/8" nipple, but in brass. Measuring the ID, I realized that although it was still pipe sized, it was a lot closer to the true 1/2" ID than the cast. Instead of attempting to drill the ID again, I used a rat-tail file to gently enlarge the ID. It only took a few gentle strokes around the inside to get a concentric 1/2" ID.
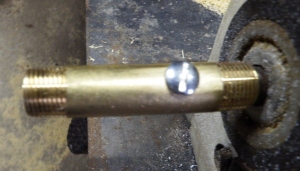
I have a few old taps on hand, so I found one that looked small enough, and hunted through my screw collection to find a match. I drilled a hole in the brass nipple and tapped the threads that matched the newly found set screw.
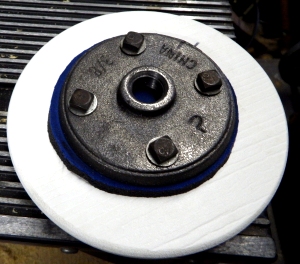
Now to make my wheels... I had decided to use cast floor flanges to mount my discs as they simply screw onto the nipple threads. I had some 1/2" thick PVC sheet laying around, and rough-cut my discs from that. I drilled holes in the PVC discs to match the flanges. I countersunk the holes on the opposite side so I could screw bolts into countersunk nuts on the other side so that side would be flush for sandpaper.
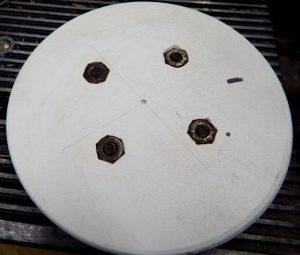
I then realized that the flanges, being cast, were not very flat, and produced a wobble when mounted. After trying several failing solutions, I came upon the idea of cutting circles from a mousepad and putting that between the flange and the disc. By doing this, I could easily true up the wheel simply by loosening or tightening the bolts.
I made several types of discs, including a disc to mount a 5/8"-11 shaft for standard tool attachments. For this I needed some extra depth to make room for the 5/8"-11 bolt. I cut a smaller disc with a hole in the center, and mounted everything together like this for this particular disc.

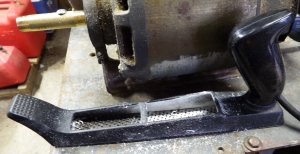
After the discs were screwed onto the shaft and trued using the bolts, I turned the motor on and used an auto body rasp to grind these into perfect circles and round out the corners a but. I then used sandpaper to complete the smoothing.
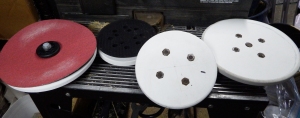
In conclusion I made four discs. Left to right:
7"
disc with 5/8"-11 shaft (purchased center hold down nut)
5" disc with standard velcro backing pad (purchased) screwed to it
6" disc for peel and stick sandpaper
7" disc for peel and stick sandpaper
Each disc screws on and off quickly, and the threading is the reverse of the motor spin, so the wheel does not work loose when spinning. Now to build a small table for the object being sanded and a dust collection bin below.