Rediware Software HTML slideshow writer © 2018 version 2.0.0
Rediware's HTML Slideshow Writer allows for easily creating slideshows to display on the web or on your own computer. There are many web-slideshow creation programs out there, but they are either labor-intensive, difficult to understand, or the result is formatted in such a way that customizing the resulting web page is prohibitive. Rediware has decided to create software that does away with some of these restrictions.
Some HTML programming knowledge is required to fine-tume your web page once you have created it with this software.
This software creates a webpage that displays thumbnails of the images in a thumbnail strip. It displays the full pictures in the main part of the screen. Pictures can be selected for viewing by either clicking the thumbnail, or using the first, next, back, and last navagation tools.
This Windows software utilizes user input to generate HTML, JavaScript, and CSS code, which can then be moved as a functioning unit to your server, or just kept on your computer if that is your desire.
1. Install Slideshow Writer onto your computer (no ads, nags, or leach software, 100% clean!)
2. Resize your pictures:
Use the the free program Picasa2
(use the create web page option) or another graphics program (I currently
use FastStone Photo Resizer, one of the best I've found!) to resize your pictures
to make them web-friendly.
Create thumbnail images from your
original pictures.
It is assumed that you are familiar
with this process. This software does not prepare your images. That is your
responsibility.
You should now have three
versions of each picture: the original, the resized-for-the-web copy, and
the thumbnail copy. (Picasa2 will generate both resized and thumbnail copies
together, FastStone will do this in two processes).
Note: AGAIN! make sure you
resize copies of your pictures, not the originals!
Note: the picture and matching
thumbnail file must have the same name, except the thumbnail images can have
a prefix up to 8 characters (such as t- if you want). Picasa2 produces both
images and thumbnails with the same name, storing them in 2 separate folders.
Note: if you use Picasa2,
make sure you remove the file picasa.ini from both folders!
3. Create one folder (we'll call this the root folder) and two subfolders under the root folder, and name them images and thumbnails. The root folder can be named anything you want. Note that these are the default folder names for Picasa2, which if using, will make things easier.
4. Put all of your resized pictures under your root folder in the subfolder called images. Put all of the thumbnails under your root folder in the subfolder called thumbnails.
5. Run Rediware's Slideshow Creator.
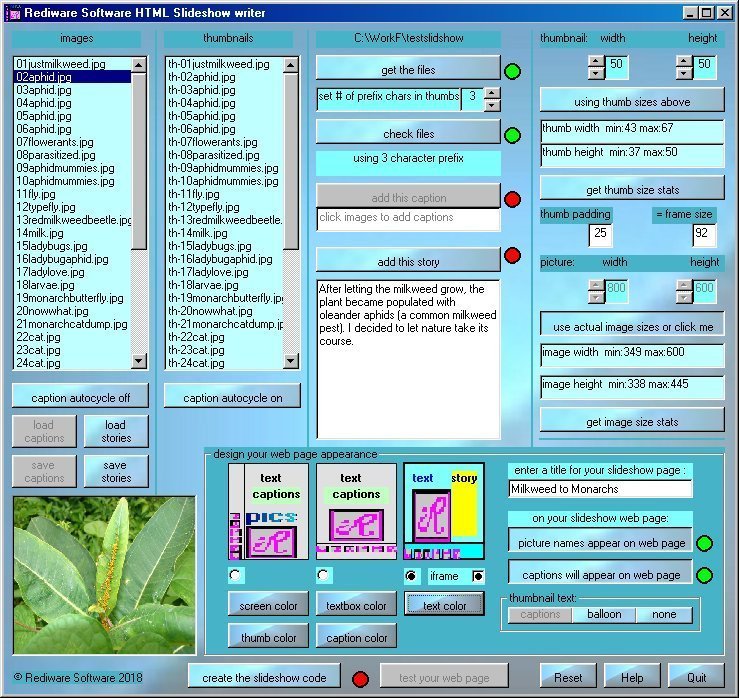
Refer to the application screenshot below:
Work your way down the button list on the application.
- Use the 'get the files' button to locate your root
folder. If the images and thumbnails folders are subfolders of the root folder
you selected, and your pictures and thumbnails exist in these folders, they
will be read, and loaded into the images and thumbnails lists in this application.
- If your thumbnails have a prefix (such as t- picture1.jpg for the thumbnails, and picture1.jpg for the pictures), change the prefix characters number to the size of your prefix (in our example, it would be set to 2). If your thumbnails and pictures are named exactly the same, set this prefix character number to zero.
- Click the 'check files' button. If your files match up with each other, the red indicator will turn green, and you will be able to proceed. If not, you will be notified of the problem, which you must correct. If this program finds a mismatch, the mismatch will be highlighted in the list. The case (upper or lower) must match also.
- Once the images and thumbnails
have been checked, click on any thumbnail or image to view the picture. The
thumbnail images will load faster because they are smaller, but if your pictures
are not huge, the images will load fast as well. The image will usually appear
crisper than the thumbnail.
Depending or the screen layout you have chosen
(discussed in detail below) the following 'adding captions' notes apply to
'adding story' as well. They both function the same.
You can then enter a caption
(or story) for that picture in the space provided. Click the 'add the caption'
button (or 'add story' button) to attach the caption (or story) for that picture.
Do this for each picture you desire a caption (or story) for.
Note: you do not have to add captions (or stories) for pictures, or you can
enter captions (or stories) only for some of the pictures.
There are two buttons below the lists, both captioned as
'caption auto cycle off'. You can turn the autocycle on by clicking one of
these. Click the button below the list you are working with (images or thumbnails
list - it doesn't matter which list you use, and you can alternate at any
time - just make sure the button below the list you are using is activated).
When the autocycle is on, the next picture will be loaded automatically after
entering a picture caption (or story), snd you can enter the next picture
caption (or story). When both of these buttons are off, you must click the
next picture you wish to caption (or story) manually.
If you have a lot of pictures to caption (or story), you
may not want to do them all at one time. After entering some of the captions
(or stories) (and you wish to continue later), click the 'save captions'
(or 'save stories') button. This will save the captions (or stories) you have
entered so far, to be added to at a later time. To continue adding captions
(or stories) , load and check your files again as you did when you first started.
Now click the 'load captions' (or 'load stories') button. This will
load the captions (or stories) that you saved previously back into the application.
You can now continue where you left off.
Note: When your web page has been completed and you are satisfied with the
results, delete the 'captions.txt' (or 'stories.txt') file that was
created in your root folder if you had previously saved your captions. This
is not needed unless you intend to add or change some of the captions in the
future, or simply wish to keep it.
- Enter a title for your slideshow. This title will show at the top of the web page that will be created.
- Turn on or off the 'click to show picture names' option. If on, your web page will show the picture name (file name minus the extension) at the top of the picture. The default is on.
- Turn on or off the 'click
to show captions' option. If on, the picture captions you entered will
be shown above the picture on the web page. If you are not entering any picture
captions, turn this off. The default is on.
Note. This option is not active if you
are creating stories and not captions for your pictures.
Note: Do not use any single or double
quotes in your captions. Because this writes HTML code, a single or double
quote inserted into the HTML code will cause the HTML file not to run correctly.
- Thumbs: captions, balloon text, none
- select one. This option will either display the caption below each thumbnail,
display the caption in a balloon text when hovering the mouse over the thumbnail,
or neither. Be sure to select none if you are not using captions (or if you
do not want them shown with the thumbnails). This is different than the 'captions
will appear on web page' option.
Note: if web page - style 2 is selected
(styles discussed further on in this document), captions under the thumbnails
is not an option due to screen space considerations and the way in which the
thumbnails are displayed.
- There are 2 scroll controls
(thumbnail: width & height) and 2 scroll controls (picture:
width & height). These are set to a default thumbnail and picture
size for your web page. You can change these if desired. If using Picasa or
another resizing program, set these values to the same values used when resizing.
To change these values, you must first click (to turn off) the 'use actual
thumb / image sizes' buttons. You can then set the picture sizes manually.
If you are not sure about changing these settings, turn on the buttons to
'use actual thumb / image sizes'. Using the actual size is the default.
If you would like to play with these values, turn the buttons
off, and click both the 'get thumb / image size state' buttons. This
will roll through all of your thumbnails and images, and post the actual min
and max sizes. You can then set the thumbnail and image sizes to the max sizes
accordngly.
- On your web page, you will
want the frame that holds the thumbnails to be wide enough to see the whole
thumbnail images. Yhe program default is either the width you set with the
thumb width scroll control, or the maximum width obtained from the 'get
thumb size stats' button. Both of these will reset the thumb frame width
to the thumb width plus 25. You can edit this frame width before creating
your html files manually by entering a width in the '= frame size'
box.
You will also see a box labeled 'thumb
padding'. This defaults to this number 25. It is the number of pixels added
to the frame size based on the thumbnail size. If you would rather set the
thumbnail frame size relative to the thumbnail size instead of entering a
hard number into the '= frame size' box, edit this number.
- Styles: Technically, version 1 of Slideshow
Writer was never officially released. During intensive testing, I decided
to add some style selections to the web page creation. Originally, the resulting
web page created was completely by default, and it was expected that you would
load up your web page creation software to make the adjustments desired. It
then occurred to me that many might not have the knowledge or software needed
to make changes easily. While no desire to get sidetracked with implimenting
HTML design software, I did add some style options.
On the center - lower part of the application
you can see three simulated screens.
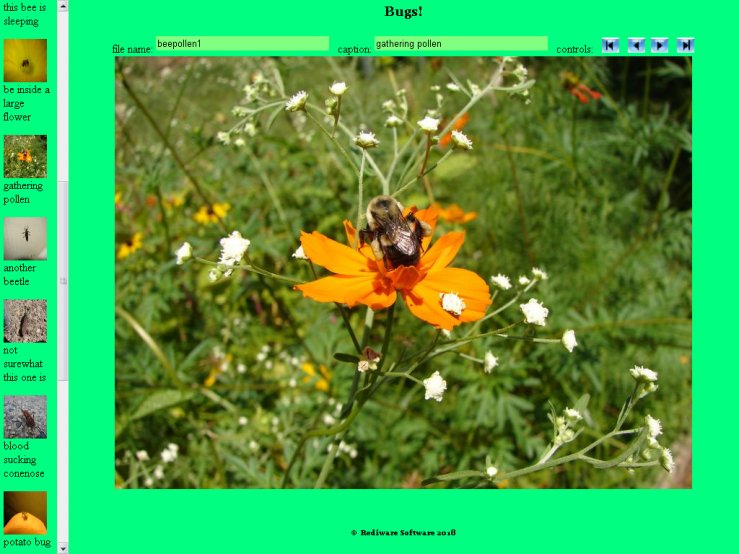
The first option creates the thumbnails in
a column on the left and the main picture screen on the right. You can display
filenames and captions at the top of your web page. You will use the 'add
captions' method if captions are desired. You can also add the captions to
appear as text below each thumbnail.
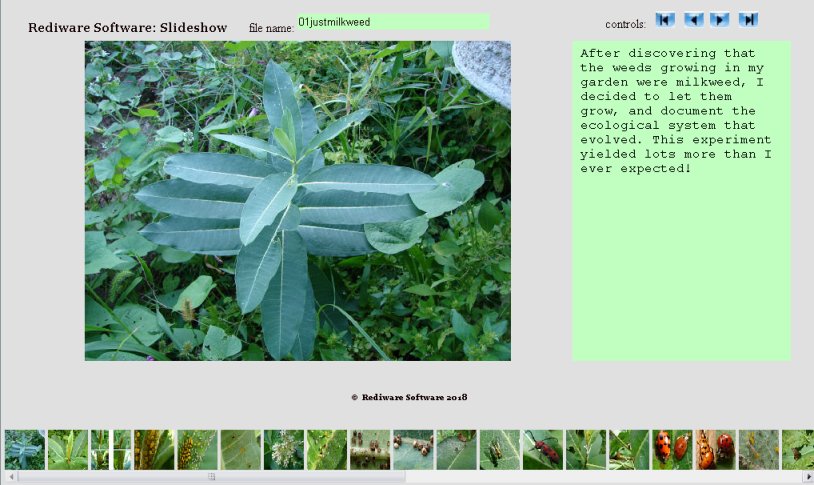
The second option creates
the main picture screen at the top and the thumbnails at the bottom. You can
display filenames and captions at the top of your web page. You will use the
'add captions' method if captions are desired. You cannot add the captions
to appear as text for each thumbnail.
The third option is what I call the presentation
option. You can display filenames at the top of your web page. You cannot
display captions at the top of your web page. Instead of adding simple captions,
you add more elaborate story lines for each picture to create a presentation
format. You will use the 'add stories' method to write about your pictures
in detail. You cannot add the captions to appear as text below each thumbnail.
The third option - plus is very similiar
to the standard third option. The difference is that the files written do
not use frames as the other options do, but uses iframes. If you do not know
what I am talking about, that's OK. There is a slight difference in appearance
even though the layout is the same. The main difference for you is that only
two HTML files will be generated, not three. If you use this selection, don't
go crazy looking for the third missing HTML file!
See an example of each style below.
Select which style you wish to utilize by selecting
the option button associated with each style, then use the buttons 'screen
color, 'thumb color', 'textbox color', 'caption color', and 'text color' to
apply changes to the selected style. You can flip back and forth between the
three styles, and changing a color will only affect the selected style. Remember
that when you are finished, the style option selected will be the style generated
along with all of the colors within that style.
The 'textbox color' is a box surrouinding the
caption and filename text, if selected for use. If you do no want this test
displayed in a box, simple make the 'textbox color' the same color as your
'screen color'. The 'text' color will not have a background or box color.
- When finished, click the 'create slideshow code. If this button is not active, you have not loaded any thumbnails / images, or they did not pass the 'check files' test.
- Your web files are now in your root folder. You can use the application's 'test your web page' button to see how your web page looks. You can then go back and make adjustments with the slideshow application if needed, and check it again.
- I have attempted to write this application for HTML novices as well as for those who have some experience writing HTML. I'm sure I have not covered everything in this application, but I will assume that with a little experimentation, the created web pages will be satisfactory for novices, and easily tweaked for those that have some experience. The author takes no responsibility for any mishap caused by this software. This software has been tested rigorously, but it cannot be guaranteed to be bug-free. If you do encounter any issues, please email me (email below) so I can correct any bugs that are found.
That's it! Now, using My Computer or Windows Explorer, navagate to the folder you originally selected to be the root folder for this software. You will see three .htm files and four .jpg files, (Remember, you do not need the captions.txt file if you created one for the web pages to work) Double-click on 'redislideshow.htm' file. (You can rename this html file anything you wish, but DO NOT rename the slidethumb and slidemain files unless you know how to change the file names in the redislideshow.htm file) Your web page and slideshow should begin.
These HTML files are written with relative paths, so you can move all 3 folders as is to your server, or anywhere else, and they should work.
For those with some experience writing HTML, you can modify the HTML files for your own purposes. All I ask is that you keep the © Rediware Software 2018 statement in the HTML source code.
If you have any questions or issues, feel free
to email me at rediware@comcast.net. You can visit our web site at
www.rediware.com.
This software is 100% free, with no ads, popups, nags, or anything other than
the actual software.
If you have a need to rename large quantities of files, maybe to add a prefix
on your thumbnails, or to add something like 001, 002, 003 etc to your images,
you can use Rediware's Renamer program, available at www.rediware.com. Just
remember that your images and thumbnails MUST have the same name, except that
the thumbnails can have a prefix (up to 8 characters). In the screenshot below,
my prefix is 3 characters.
Screenshot of the Slideshow HTML Writer software in action
Example result for style option one.
Note: screenshot was taken with F11 pressed on the web page.
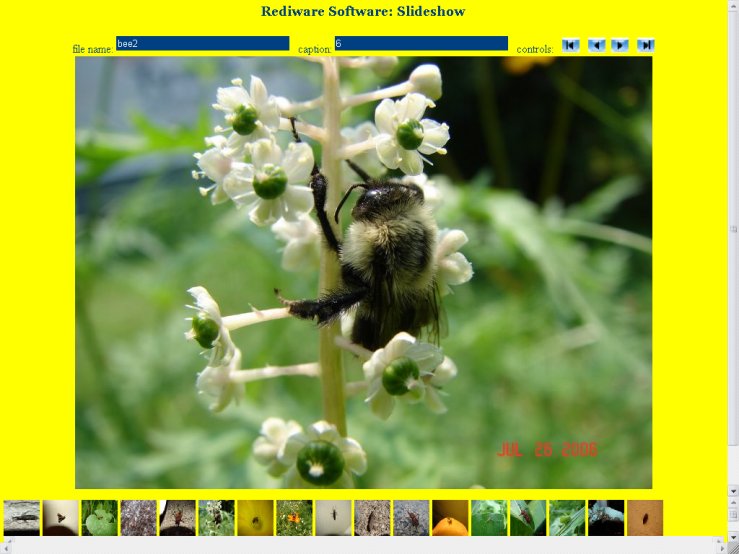
Example result for style option two.
Note: screenshot was taken with F11 pressed on the web page.
Example result for style option three.
Note: screenshot was taken with F11 pressed on the web page.